!----> !----> !---->
Other Products
Innovations
Discover Air Fry
NEW IN COOKING
DISCOVER TOTAL CONVECTION
You haven't registered any appliances yet.
Your Appliance
Your Appliances
You haven't registered any appliances yet.
Resource Library
Service & Maintenance
To prevent children from accidentally changing the dishwasher settings or starting the dishwasher, you can lock the controls.
For Plastic Tub Dishwashers -
Press and hold DELAY START for 3 seconds. An indicator light on the lock graphic pad will illuminate when the controls are locked and no new selections can be made until the lock is released.
To unlock the controls, press DELAY START again for 3 seconds, and the indicator light will go out.
For Stainless Steel Dishwashers -
Press DELAY START until the display window displays "loc".
To unlock the controls, press DELAY START until "loc" is no longer displayed in the displaystatus window.
It is normal for you to hear the water filling in your dishwasher along with water circulating and the motor running. If you hear a knocking or banging sound, check to ensure you do not have dish, pot, pan, or utensil causing the spray arm to circulate improperly.
For models equipped with the fan-assisted Even Dry or Perfect Dry system, it's normal to hear the fan operate at various times during the cycles.
Frigidaire High-Efficiency Laundry Centers use less water and energy by incorporating elements such as low-profile agitators and sensory technology.
When your iron is in the standby safety mode, simply press one of the fabric selector buttons (+/-) to start using it again.
Yes, your iron can be used for vertical steaming. Just please don’t steam clothes while they are being worn by someone.
Yes, you can! Detergent Boosters or enzyme products may be added with your detergent.
If you have a Ready Steam Dryer, its advanced technology will remove wrinkles and freshen clothes.
You can also select the "Add Steam” option with many cycles. Depending on your model, you may want to use the “Wrinkle Release” or “Extended Tumble” options.
In general, for best results when drying your clothes, follow these simple steps:
To remove wrinkles from clean, dry clothes, select “Instant Refresh” cycle (available on some models) or tumble them on low heat for 10 or 15 minutes.
When using fabric softener / dryer sheets, please refer to your Complete Owner’s Guide (not recommended with steam options).
Simply follow the instructions in the email and click the links that apply to you. You should receive emails notifying you of the steps required for this action. Check your spam filter and add Frigidaire Appliances to your safe sender list if you aren’t seeing them. You can also follow the steps below.
A few tips to help you:
Download the Frigidaire 2.0 App on your Apple or Android phone
NOTE: If you are an Android user, we recommend turning your unit on for 24 hours before you download the new app and connect.
It is a professional term rating an air conditioner. BTU stands for British Thermal Unit - the quantity of heat required to raise the temperature of one pound of water one degrees Fahrenheit.
The higher the BTU the larger space the room air conditioner will cool.
Yes, if power is lost to the entire house, your router will be disconnected from the internet as well, thus disconnecting the connection to your appliance. The good news is that as soon as power is restored, the appliance should re-connect and function normally without user intervention. This may take up to a minute. You may receive a “lost connection” notification in the Frigidaire 2.0 app.
Absolutely! You can download the Frigidaire 2.0 app to multiple devices in the same household. However, you will need to use the same email and password to log in.
The network signal from your Frigidaire connected appliance will not have browsing capability, so some phones may be hesitant to connect to it or alert you that it is not connected to the internet. This is normal and you should be able to move forward.
If the phone does not stay connected to the network, try checking your network settings for features like “Smart Network Switch”, “switch to mobile data” or “avoid weak networks”. If these features are active, they may impede the connection and should be temporarily turned off.
Apple, the Apple logo and iPhone are trademarks of Apple Inc. registered in the U.S. and other countries. App store is a service mark of Apple Inc. Google Play is a trademark of Google Inc. Amazon, Alexa and all related logos are trademarks of Amazon.com, Inc. or its affiliates.
If you plan to store the air conditioner during the winter, remove it carefully from the window according to the installation instructions. Cover it with plastic or return it to its original carton.
NOTE: To prevent rust or electrical connections from being damaged, store air conditioner in an upright position and a dry place.
Proper air flow into the air conditioner is essential for performance and safe operation. Under no circumstances should you block or cover any exterior or interior vents of the unit.
In general, your iron will heat up in about two minutes. The “Wait” and “Ready” indicators will let you know when your iron has reached the appropriate temperature for the fabric type you selected.
There are few items to check if you experience drainage issues with your Frigidaire Top Load washer especially if it was recently installed.
Check the drain hose – if it’s kinked, straighten it to improve the water flow to the drain.Be sure the drain is clear and not clogged.
The standpipe cannot be more than 96 inches high.If the drain hose has been taped (or sealed) into the standpipe, the seal should not be completely tight because the standpipe requires air for proper draining.
You may need to remove some of the tape on the seal to make an air path.Make sure the drain hose isn’t fitted too tightly in the standpipe.
The standpipe needs to be at least 1 ¼ inches in diameter.If you suspect your pump is clogged – you may need to contact service.
Did you know…using too much laundry detergent can inhibit draining? Always use the recommended amount of detergent and do not fill any compartment in your dispenser beyond the maximum amount line.
The Frigidaire 2.0 app is free! Standard text rates may apply if you opt to receive text message notifications.
If your microwave model has a glass tray or turn table, then follow the instructions printed on the popcorn label and place the bag on the turn table.
In some instances, if you have a metal turn table (instead of glass), you do need to set the popcorn bag on a popcorn/bacon plate.
This plate will lift the popcorn bag off of the microwave’s metal turntable, which can otherwise interfere with the metal contained in the popcorn bag.
Once you have loaded your washer and closed the lid, press the POWER button to turn on your appliance.
Then, turn the cycle selector in either direction to scroll to your desired cycle. In some models the indicator for your selected cycle will be illuminated. Based on the cycle selected, the estimated cycle time, wash temperature, soil level and options associated with the cycle chosen may also illuminate.
After making your selections, press START to begin.
In most models:
To change your cycle, settings or options once the load has started, you will need to press the POWER button before selecting new ones.
Simply turning the cycle selector will not change the selection. If changes are attempted after the cycle starts, the lights will flash and a signal will beep.
TIP: For descriptions of each cycle, setting and option…and when best to use, check out your Owner’s manual for more information.
Products that are ENERGY STAR® qualified are equivalent to or better than standard products, with one important difference: they use less energy. To earn the ENERGY STAR® rating, products must meet strict energy efficiency criteria. Because they use less energy, these products save money on your electricity bill and help protect the environment by reducing harmful emissions from power plants. Plus, you get all of the features and quality you expect.
For more information, see: ENERGY STAR Canada
If your Frigidaire Laundry Center was recently installed, here are few things to note:
Specifically for gas models, make sure the gas supply valve is open and the dryer has enough air supply to support the burner flame.
Electric models should be connected a 240 volt circuit. If your electric dryer is connected to a 208 volt circuit, your drying times will be increased 20%.
Check your installation instructions for more information.
Additional tips to try:
Check that you have selected the appropriate temperature setting for your load. If you load is too big, it will take longer for your clothes to dry.
Check that your dryer has proper ventilation.Clean the lint filter after every use. Do not use the dryer on your laundry center if the lint filter is blocked, damaged or missing.
Ensure the exhaust duct is not restricted. Make sure to leave room for the items in the dryer to tumble freely so you can avoid damp areas on your clothing. It’s recommended to fill the drum 1/3 to ½ full. This also helps reduce wrinkling.
Drying times may also be increased in areas with high humidity.
If you are unable to resolve an issue or need more information, please contact us.
Yes, you can!
If using liquid bleach – add the bleach to the compartment located in the left front corner under the washer lid and then add 1 cup of water to flush the dispenser.
It is not recommended to put powdered bleach in the bleach compartment but rather add it directly to the wash tub BEFORE adding your laundry.
If your freezer won’t close, it might be because the lid does not tightly fit the shape of the unit. The lid is designed to be flexible, allowing it to conform to the unit. If you notice that the lid is wrapping at one corner and/or not forming a tight fit, simply raise it and allow it to close sharply—this will help reestablish a tight fit.
Crispy food needs enough oil to bind batters and coatings, but not too much or you'll end up with soggy results.
If the food has a crumbly or floury outside texture, try spraying it with a little bit more oil.
If you're making air fried food from scratch, spray your homemade items with a light coating of oil (too much and the food won't get crispy) and arrange foods so the hot air circulates around each piece as much as possible.
We recommend you use the self-clean function once a month.
The air filter should be checked at least once a month to see if cleaning is necessary. Be sure to unplug the unit before cleaning to prevent shock or fire hazards.
To clean the filter, open the front panel and remove. The air filter is reusable and may be cleaned using liquid dishwashing detergent and warm water.
After cleaning allow the filter to thoroughly dry before replacing. You may also vacuum the air filter to remove excess dirt and particles.
Unlike other metal objects, the metal rack included with your microwave is specially designed for safe use. The design takes into account the pattern of microwaves to prevent arching and sparks.
For example: The plastic spacers which hold the rack in place are engineered to keep it from arching against the microwave’s sides. The rack’s tines and outer edges are engineered to form a fully enclosed object, avoiding the open ends that lead to arching.
No other metal objects, including pans, utensils, etc. are approved for use inside a microwave.
Of course!
You can use fabric softener with your laundry center by following these simple steps:If your laundry center is equipped with a dispenser, add the fabric softener into the dispenser compartment labeled Fabric Softener and select the Fabric Softener button.
If you do not have a dispenser, you can
1) add diluted fabric softener to the final rinse or
2) use a fabric softener dispensing ball.If you choose to use other wash products such as water conditioners, detergent boosters, and enzyme products – just simply place them directly in the wash tub with your detergent BEFORE adding your laundry.
Always refer to your detergent and/or bleach manufacturer’s instructions for proper dosage.
For all new ENERGY STAR products the EPA has regulated that all ENERGY STAR air conditioners must be factory set to Energy Saver (Econ) mode.
If you turn the room air conditioner off in cool mode, and restart the unit it will default back into Energy Saver mode.
You may select out of Energy Saver mode by selecting the mode button, however we recommend using the feature to help save energy.
Air Fry is an oven feature that works like a countertop air fryer. Inside an air fryer oven, superheated air circulates around the food to provide crispy, golden results without all the oil that deep frying requires.
Air fryer ovens like the Frigidaire Gallery 30” Front Control Induction Range With Air Fry eliminate the need for another countertop appliance by putting the same technology right in your oven.
If your dryer isn’t operating, it might be because:
The motor is overheated. Overloading the dryer can cause its motor to overheat. If this is the case, allow the motor to cool down for 30 minutes.
You might need to reduce the size of the load—the average washer load will fill the dryer drum 1/3 to 1/2 full. If letting the motor cool down and reducing the load size does not resolve the issue, contact your authorized service provider.
The thermal limiter switch is activated. On electric dryers, a thermal limiter switch automatically turns off the motor in the unlikely event of an overheated situation. If this is the case, you’ll need to contact a service provider to replace the thermal limiter switch.
If you are unable to resolve an issue or need more information, please contact us.
For descriptions of each cycle settings and options…and when best to use, check out your Owner’s manual for more information.
Always remember to check that the lint filter is clean and in place! Load items loosely. The average wet load will fill the dryer drum 1/3 to 1/2 full. Items need room to tumble freely for even drying and less wrinkling.
TIP: If drying a single large or bulky item, such as a comforter, remove the item part way through the cycle and turn it “inside out” to maximize drying effectiveness. Place the item back in the dryer and re-start cycle. You will also easily find solutions to common drying inquiries such as piling, shrinking and wrinkling.
Frigidaire Dryers have amazing features that allow you to effortlessly keep up with your family’s wardrobe changes. The large capacity and fast dry times of our newer models save on energy use and time.
For descriptions of each cycle settings and options…and when best to use, check out your Owner’s manual for more information.
You will also easily find stain removal suggestions and solutions to common washing inquiries such as residue, wrinkling, etc...
When this feature is on, the electronic air purifier is energized to remove pollen and impurities from the air. To cancel this feature, press the Clean Air button.
We strongly recommend that you use HE-rated detergent. Frigidaire Laundry Centers are High Efficiency machines that use significantly less water than traditional washing machines. HE- rated detergents are designed for lower water levels.
For best results, use a high-efficiency detergent because they are designed for Frigidaire Laundry Centers like yours, which use less water.
They are also formulated to reduce soap suds and ensure proper cleaning.
For powder, liquid, or detergent packs -
Simply, add your detergent directly into the wash tub BEFORE adding your laundry – this will help mix the detergent into the water. The amount of detergent depends on the type of detergent you are using, load size, and water hardness.
If using liquid bleach - add the bleach to the compartment located in the left front corner under the washer lid and then add 1 cup of water to flush the dispenser. It is not recommended to put powdered bleach in the bleach compartment but rather add it directly to the wash tub BEFORE adding your laundry.
You can use fabric softener with your laundry center by following these simple steps:
If your laundry center is equipped with a dispenser, add the fabric softener into the dispenser compartment labeled Fabric Softener and select the Fabric Softener button.
If you do not have a dispenser, you can
1) add diluted fabric softener to the final rinse or
2) use a fabric softener dispensing ball.
If you choose to use other wash products such as water conditioners, detergent boosters, and enzyme products – just simply place them directly in the wash tub with your detergent BEFORE adding your laundry.
Always refer to your detergent and/or bleach manufacturer’s instructions for proper dosage.
High-efficiency washers are designed to use less water and energy.
It is perfectly normal for the water level to appear lower than what you may have experienced with an older top load washer.
Most Frigidaire Top Load Washers rely on sensory technology and will determine the proper water level for each load – water will enter the tub once the sensory cycle is complete (this may take a few minutes).
If water is flowing to your washer slowly or isn’t flowing in at all, you might find a solution by checking the following:Hot and cold water faucets. Be sure your water supply faucets are completely open.Washer-fill hoses.
Check your water hoses to see if they might be kinked. If so, simply straighten the hoses.Water pressure. Your washer needs sufficient water pressure to fill.
Check to see if water is being used elsewhere in your home such as shower, bath and dishwasher while the washer is trying to fill.Washer lid.
Make sure the lid is completely closed. Your washer will not operate with the lid open.
Filter on water valve.If the filter screens on your water valve are clogged, turn off your water faucets and remove the hoses from the valve connections.
Clean the filter screens and then reconnect the hoses; turn on the water.Drain hose standpipe.
Check to ensure the drain hose standpipe is at the correct height – it must be a minimum of 36” high to prevent siphoning.
Refer to your Installation instructions for more information.
For laundry loads needing extra water, some Frigidaire Top Washers have the Max Fill feature.
Pressing the Max Fill button adds the maximum amount of water possible, and will increase the duration of the cycle time. The Max Fill feature is not recommended for regular day-to-day use but more on an as needed basis.
If you are unable to resolve an issue or need more information, pleasecontact us.
On the sign-in screen in your mobile app, simply click on the “Forgot Password” button. You will be prompted to enter your email address and then you will be sent a link to reset your password.
If you are on the legacy Frigidaire Smart App, you will need to migrate to the new and improved Frigidaire 2.0 App. Impacted consumers should have received an email with a password reset link. Check your spam folder if you did not receive this.
Most French-Door refrigerators are equipped with shelves that are supported at the back of the refrigerator. To adjust your shelves, remove all items from shelf / shelves and lift the front edge up. Next, pull the shelf out and replace the shelf by inserting the hooks at the rear of the shelf into the wall bracket. Lower the shelf into the desired slot and lock into position.
Some models have glass shelves that slide out for easy access. The shelves slide out independently of their mounting brackets, just pull the front of the shelf forward. Shelves can be extended as far as the stopper will allow but are not removable from their mounting brackets. Our door bins (vary by model) are removable for easy cleaning but some of them have fixed positions while others can be adjusted.
To change the position of an adjustable door bin simply remove all items from the bin and then grip the bin firmly with both hands and lift it upward. Next, remove the bin and place it just above the desired position. Then, lower the bin onto the supports until it's locked in place and place the bin liner into bin (if removed).
To remove your upper freezer basket, find the side where the basket frame is aligned to the clip opening (either left or right side). If not aligned on either side, push the basket sideways until it is aligned by grabbing the basket wire frame close to the frontal clip and pull it up to take the basket frame out. Grab the basket frame close to the rear clip and pull up until it comes out of the clip.
Once one side of the basket is off the clips and retainers, slide the basket sideways until the other side of the frame is aligned with the clip openings on the opposite side of the freezer. In the same way, pull the basket frame from the frontal and rear clips until it is out of the clips. Remove the basket and reverse the steps to reinstall.
For more information, refer to your Owner’s Manual. If you have any questions, please contact us.
Water dripping outside is a normal function of the room air conditioner, especially during periods of excessive humidity.
If condensation need to be directed, window air conditioners have a key hole drain in the bottom of the unit where one could connect a ½” drain hose for safe disposal of excess system water.
Part: EA150D / 5304481680. Never drill holes into the bottom of the room air conditioner to remove water. If water is dripping inside the room during the cooling, this is due to improper installation. Please refer to installation instructions or check with your local installer.
Induction cooking directly heats the pan; heating will only begin when cookware is properly placed on the cooking zones.
Fast and efficient - Induction cooking zones heat faster and use less energy. Induction power levels are quick to boil and they are efficient when simmering. A cooler cooktop - A unique feature of the induction cooking zones is, whether it is turned on or off, the cooking zones remain cooler than radiant type elements.
Virtually no wasted heat is produced since the heat begins with the presence of cookware. Easy cleanups - The cooler cooking zones make cleanup easier. Spills resist sticking or burning so they wipe up easily. Magnetic detector - The cooking zone has a sensor that automatically detects whether cookware is magnetic.
This will reduce accidental “turn-ons.” Pan size detection - The pan size recognition sensor automatically detects and adapts the induction cooking zones to the pan sizes in use for consistent, more even cooking. More responsive - Induction cooking zones are more responsive than their electric or gas counterparts because only the pan heats.
This type of cooking heats easier and will be just as responsive when reducing to a simmer.
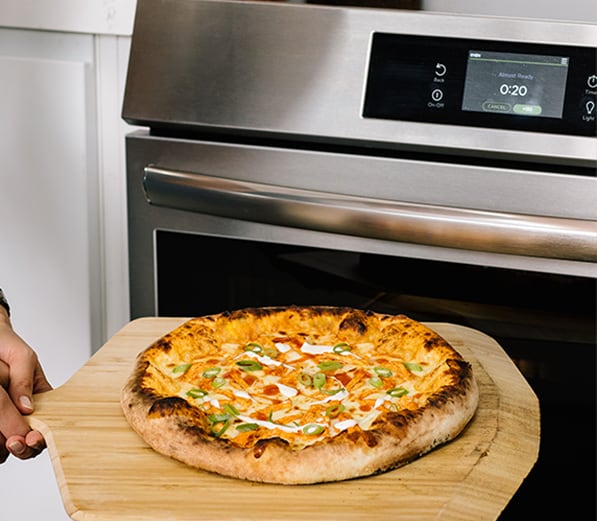
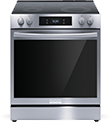
Air Fry uses really hot air to cook food fast and make it crunchy.
Although Air Fry uses hot air to cook, remember that you are still frying your food so it gets crispy!
When some high-fat or greasy foods (like fresh wings) meet that hot air inside an oven, some smoke is normal.
If Air Fry is making a lot of smoke, try these tips:
When using the Air Fry Tray, put a baking sheet on a rack or two below the Air Fry Tray. This keeps drips and crumbs from landing on the oven bottom, where they can burn and create smoke.
For additional protection, place some foil-lined parchment paper on the baking sheet. Parchment paper traps oil and keeps it from smoking.
Use cooking oils that can stand up to a high temperature like avocado, grapeseed, and peanut oils. Cooking sprays made from these oils are available at the grocery store.
Keep foil, parchment paper, and bakeware of the bottom of the oven. The oven bottom needs to stay clear so air can circulate.
Don’t overcrowd the food on your baking sheet or on the Air Fry Tray. If air can’t circulate around each item, the cooking and crisping process may slow down and allow more grease to settle or drip.
If your catch-tray is smoking, try placing parchment paper on it to hold grease.
For extra-moist foods, you may have to use more. It’s worth it!
Some foods, like fresh wings and some vegetables, have a lot of moisture and may drip more than you expect.
For items that might drip, use a pan with low sides if you’re not using an Air Fry Tray.Air Fry uses superheated air, so if your oven bottom already has drips or crumbs on it (it happens!), those can smoke.
Keep your oven bottom clean.If you have an oven vent, use it when cooking with Air Fry, like you would when using the cooktop.
For best results, use a high-efficiency detergent because they are designed for top load washers like yours, which use less water.
High-efficiency detergents are also formulated to reduce soap suds and ensure proper cleaning.
Non high-efficiency detergents may cause excessive soap suds and result in detergent residue on your clothing at the end of the cycle.
For powder detergent:
Remove the Main Wash - Liquid Only cup from your dispenser and add the powder detergent directly to the Main Wash detergent chamber.
For liquid detergent: Add the detergent to the Main Wash – Liquid Only cup in your dispenser. Do not exceed the MAX fill line.
For detergent packs: Place the pack directly into the washer tub BEFORE placing your laundry into the washer. This will help mix the detergent into the water. Do not place the pack in the detergent dispenser as the gel coating may cause the detergent drawer to become clogged.
NOTE: Follow the detergent manufacturer’s directions. The amount required depends on the type of detergent, load size and soil level, and water hardness.
Some noises are perfectly normal with your Frigidaire Laundry Center.
When the lid lock becomes engaged or disengaged, you will hear a double click sound – just locking the lid.Heavier loads occasionally cause a thumping sound at the beginning of the spin cycle – no worries!
Check for belt buckles or other fasteners on clothing items being washed or dried that may cause rattling or clanking sounds.
TIP: Fasten these items or turn your clothing inside out to reduce sounds.Check the pockets! Rattling and clanking can also be caused by loose or foreign objects such as coins in the washer tub or dryer drum.Simply stop the washer or dryer and check for any objects.
If you don’t find anything and the noises continue, try running an empty load to see if the noise persists. This will allow you to determine if the noise is coming from the washer, dryer or an article of clothing.
Specifically for your dryer:
The dryer drum is supported by a set of suspension rollers. At times there may be a thumping or rolling sound when the dryer starts. This may happen if the dryer has not been in use for a period time, or after a heavy load has remained in the dryer drum for an extended period time.
The noise should go away as the dryer operates. Your dryer is equipped with a high volume air handling system. In some cases there may be sounds associated with air movement throughout the dryer, including the air duct, blower, and exhaust system.
This is normal and can vary with the load size.
If your dryer does not start, it might be due to one of the following reasons:
The start button needs to be pushed or turned for long enough to engage. Push or turn the start button and hold it for two seconds.
The cycle selector knob is not quite at the start position. To be sure it’s correctly positioned, simply turn the knob until the indicator is a little further into the cycle.
The dryer door is open. The door must be completely closed for the dryer to run.
The power cord may not be plugged in, or the connection may be loose. Check to be sure the plug fits tightly into the wall outlet.
Note: Do not use an extension cord.A fuse is blown in your home, or a circuit breaker tripped. If this is the case, reset the circuit breaker or replace the fuse (but do not increase the fuse capacity). If you have an overloaded circuit, contact a qualified electrician to correct it.
If you are unable to resolve an issue or need more information, please contact us.
Belt buckles or other metal fasteners on items being dried may cause rattling or clanking sounds. You can fasten these items or turn garments inside out to reduce the sounds.
Rattling or clanking sounds may also be caused by foreign objects (such as coins) in the drum.
If you think this is the issue, stop the dryer and check for any objects in the drum. If none are present and the sounds continue, we recommend running an empty load to see if the noise continues.
This will allow you to determine if the noise is coming from the unit or an article that was being dried. If the noise is still present during the empty load, please contact us.
The normal operating sounds of a dryer are listed in your Complete Owner’s Guide and include:
If you are unable to resolve an issue or need more information, please contact us.
The size of the window unit needed will depend on the size of the room you wish to cool. To determine which size you need, measure the width of the room by the length and multiply those numbers together to determine the square footage.
You may need to adjust your shelves or door bins for spacing needs or simple care and cleaning.
Before adjusting the shelves and/or door bins, remove all the food items.
Remove the shelf by pulling forward to the stop position using 2 hands to avoid dropping.
Lift the front edge up and pull it out to replace the shelf.
Next, rest the side edges on any pair of shelf rails and carefully push shelf back into position. Some Top-Freezer refrigerator models have door bins (or racks) to accommodate taller or larger items.Before removing door bins (or racks) remove all the food items.
Push on the bin (or rack) sides to release from the locking tabs. Then, pull straight out to install the door bin (or rack) simply push straight ahead. You may hear the sides lock into the tabs.When cleaning shelves and/or door bins, allow any glass components to warm to room temperature before immersing in warm water to prevent damage. Simply use warm, soapy water or glass cleaner.
If your load is out of balance, it may prevent the washer from spinning.
Rearrange the items in your load to allow proper spinning, possibly adding one or two similar items to help balance the load.
A If the load is comprised of items that cannot be distributed around the drum, such as a single pillow or stuffed animal, the washer will not spin.
Additional items will need to be added to the unit to better balance the weight of the load. A If you are unable to resolve an issue or need more information, please contact us.
For stainless steel models, we recommend using Frigidaire ReadyClean Stainless Steel cleaner. It provides streak-free shine, protective coating repels dust and dirt, and gently cleans tough stains. Wipe with the grain to prevent scratching. Always follow the manufacturer’s instructions when using.
High-efficiency washers are designed to use less water and energy.
It is perfectly normal for the water level to appear lower than what you may have experienced with an older top load washer.
Most Frigidaire Top Load Washers rely on sensory technology and will determine the proper water level for each load – water will enter the tub once the sensory cycle is complete (this may take a few minutes).
For laundry loads needing extra water, some Frigidaire Top Washers have the Max Fill feature.
Pressing the Max Fill button adds the maximum amount of water possible, and will increase the duration of the cycle time. The Max Fill feature is not recommended for regular day-to-day use but more on an as needed basis.
After a power outage, the unit will memorize the last setting and return the unit to the same setting once power is restored.
Frigidaire Laundry Centers have low-profile agitators that clean laundry in a different way than traditional washing machines.
These high performance washers are designed to use less water and energy while being gentle on your clothes. The low profile agitators also free up space for larger loads, making it easier to add and remove laundry.
Your over-the-range (OTR) microwave, it will come with all the necessary installation hardware. Each of our models comes with a complete set of installation hardware.
Since the features and appearances of silverware baskets may vary by model, please reference your Owner’s Manual.
However, here are some overall helpful tips:
Load the silverware basket while it is in the bottom rack or take the basket out for easy loading on a counter or table.
For silverware baskets with lids, small items like baby bottle caps, jar lids, etc. can be placed in a covered section to hold them securely in place.
Be sure nothing protrudes through bottom of silverware basket or rack that may block the spray arm.
We recommend you do not mix silver and stainless to avoid damaging the silver finish.When you are not using the lids to your silverware basket, mix items in each section of the basket with some items pointing up and some down to avoid nesting.
The water spray cannot reach nested items.